Labeling isn’t just for those with OCD! It’s the finishing touch to organizing projects; the icing on the cake, providing clarity and order. In this blog you’ll learn how to label like a professional organizer and start enjoying the benefits of a well-organized-and-labeled space.
Why you should label:
If you haven’t jumped on the label train, let’s talk about the benefits of well-labeled spaces.
First, labeling is your organizing insurance policy! Labeling reminds you about the organizing decisions you’ve already made.
How many times have you stared at un-labeled bins, racking your brain about what you put in them last year?
Labeling solidifies the organizing system you have established. In the moment, it is easy to think you’ll remember the system you set up. But, failing to label is the quickest way to undermine your hard work!

Second, a good labeling system doesn’t just benefit YOU, it also instructs anyone else using the space. Labeling keeps the organizing system going regardless of the person using it. This ensures the longevity of your organizing systems!
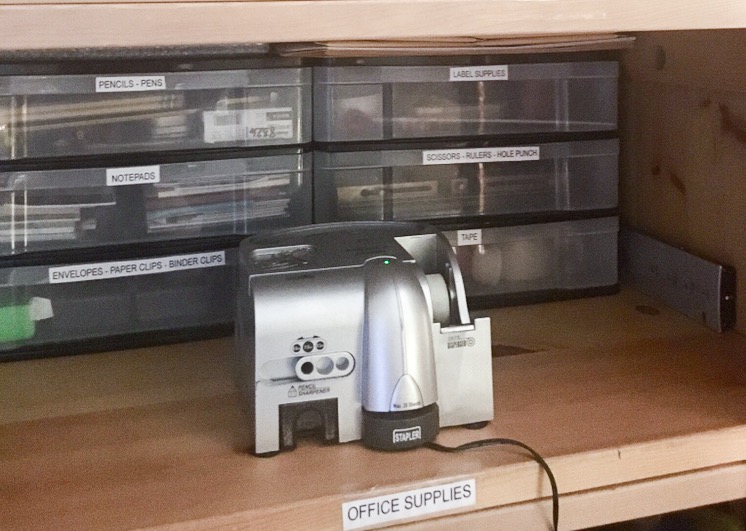
One reason for this is that labeling a space says just as much about what NOT to put in a space. For example, it’s hard to justify stashing a stray candle on a shelf labeled “Office Supplies,” but it’s easy to stash on undesignated space. Labeling creates cognitive dissonance for anyone attempting to violate your system!
Finally, labeling makes items easy to find AND to put away, saving you time and brainpower!
How to label:
Learning how to label well is also important. As with all organizing strategies, labeling is not one size fits all! There are a few things to consider when labeling products:
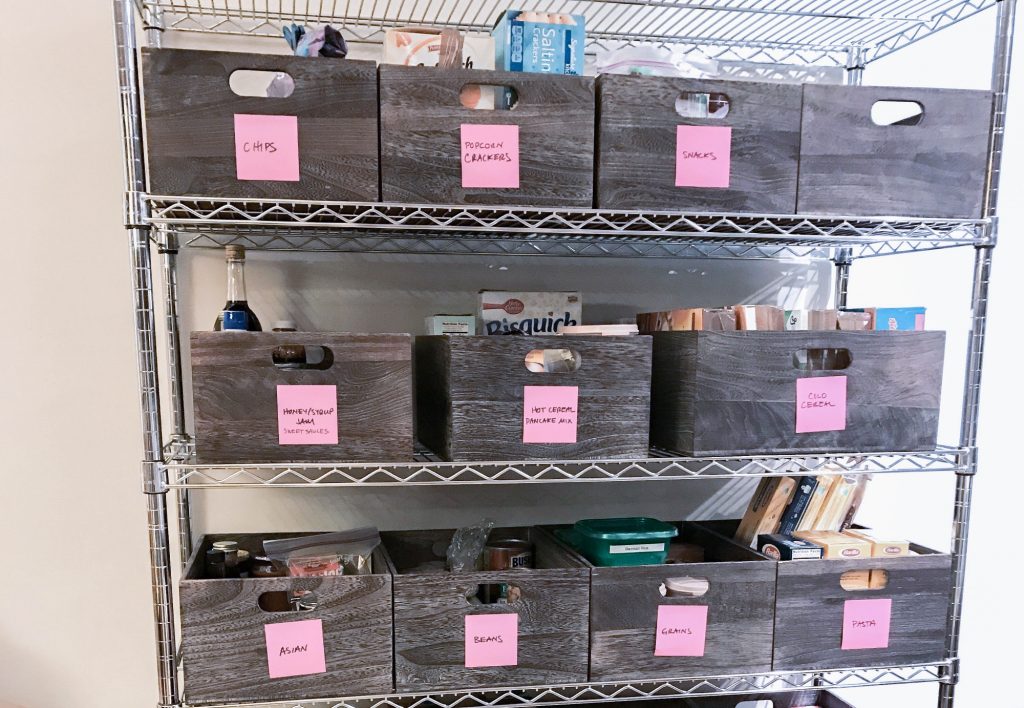
Start with Movable Labels
Part of knowing HOW to label like a professional is knowing WHEN to label! Labeling is the last step in an organizing process. In the meantime, use sticky notes for interim labels. This allows you to change your mind and move things around easily and helps you avoid having to re-label a space.
Consider the User
Make sure the labels are readable by the user! Small labels work well for files, but for larger items or for those who have a harder time seeing well, use a much larger font.
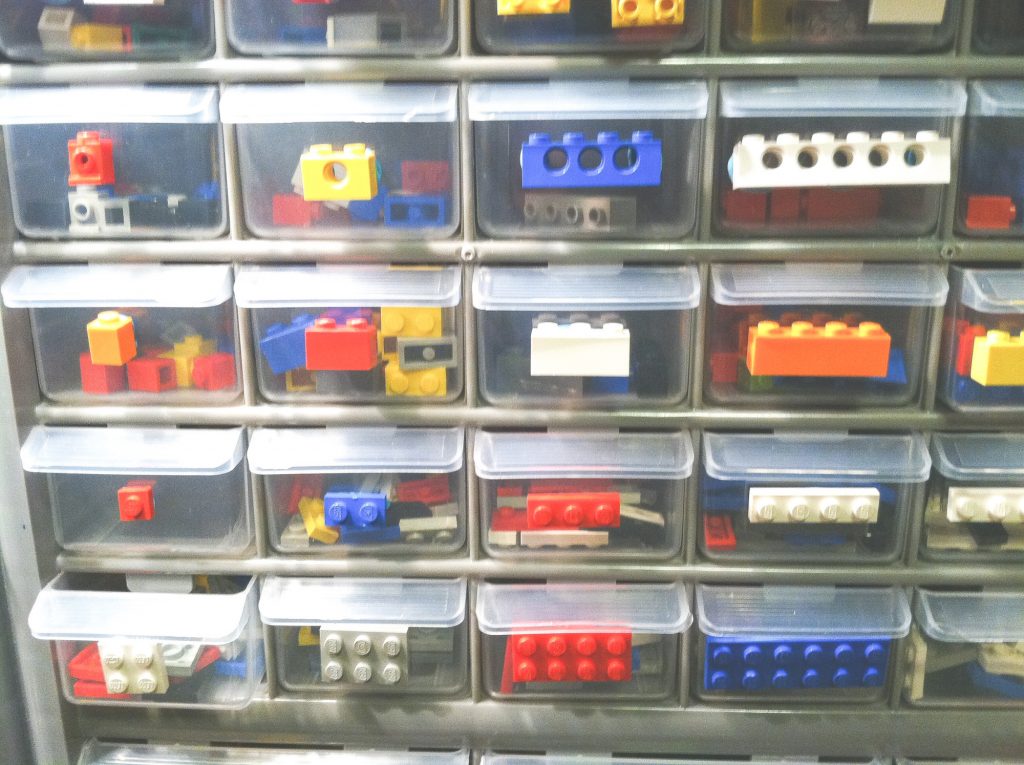
Additionally, consider using images to label in situations where you have young children using a space or people who speak different languages. Polaroid pictures or drawings of the contents of a container make great labels. When my boys were little, I used actual Lego pieces to label their organizing system.
Considering WHO is using the space is integral to labeling well. After all, organizing is all about the individual!

Uniformity
Using uniform size, color, font, and font size for your labels is easier on the eye than haphazard labeling. Stick with one format for each kind of item.
I like using capital case for certain files or projects, and sentence case for others. Sometimes, to create differentiation, I will use capital case to indicate a category and sentence case to indicate a subcategory of items – depending on the project.
Uniformity in labeling cuts visual clutter, directing you quickly to what you need.
Color
Don’t overlook the power of using color in labeling! Color can be a great way to visually differentiate categories of items. Some ideas of how to use color in your labels:
- Use a different color for each family member when labeling in combined spaces

- Use different colored labels for bins in a storage space by holiday. Red
bins could be your Christmas bins, orange your fall bins, etc. This allows you
to quickly find what you’re looking for in larger storage areas.
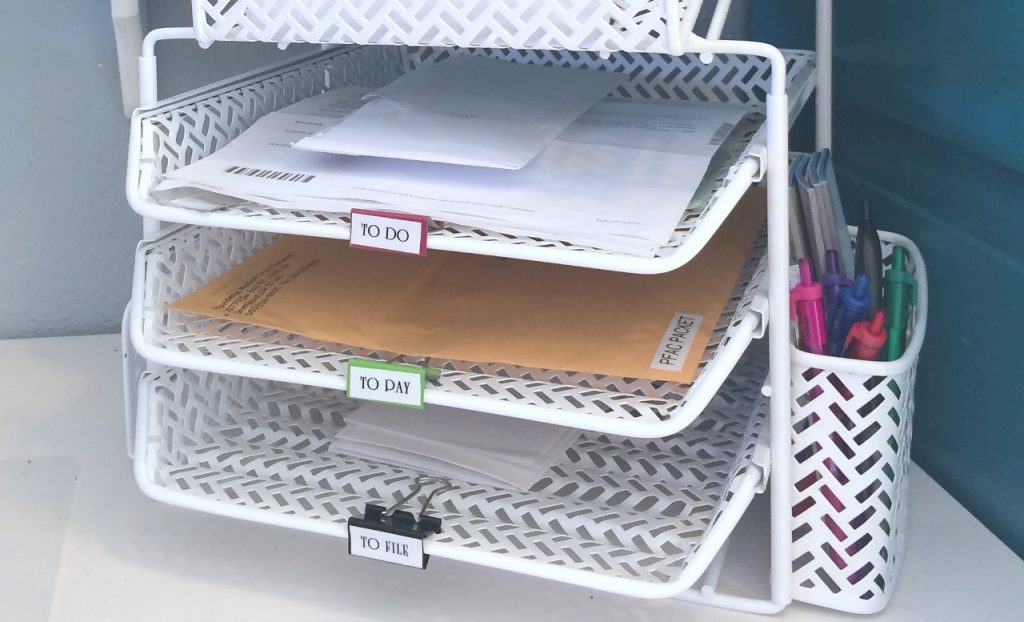
- Indicate the type of incoming paper in a tray system using colored labels. A green label might indicate incoming financial paper, a red label might denote incoming health paperwork, and a yellow label might mean household papers.
- Use different colored labels depending on the destination space. Items that belong in the craft closet get labeled one color, while items from the linen closet are labeled a different color. This can also be especially effective for multi-user work spaces!
Wording
Label according to how YOU (or the user of the space) think!
What do you think of when you go looking for an item? Take the example of financial paperwork; instead of labeling a file “Wells Fargo Account,” label it according to what the account means to you, like: “Personal Checking.”
You want the label to quickly match your thought when you’re searching to cut down your processing time!
- Permanent vs. Changeable – If the contents that live in a space tend to change over time, consider labels that can easily be erased and changed. We love chalkboard labels or dry erase labels for this! (They also look adorable!)
Make it stick
I can’t imagine life without my label maker. But, if you don’t own one, don’t let that stop you!
You can dust off your fancy vinyl cutting machine (careful, if you go this route you may start getting orders from friends!), print labels on paper, or simply write with good, clear handwriting.
Whatever type of label you use, make sure to fully secure it to the spot. Clear packing tape is great for securing labels!
Get creative
Other creative ideas:
- Use 3×5 cards with clothespins
- Tie gift tags to baskets
- Label the ends of binder clips to add a label to flat shelves
Where to label:
I’m sure you know the importance of labeling files (ALWAYS label files!) and bins, right?! But, there are so many more places where labeling can make your life easier!
It’s a great idea to label bins that are stored on shelves, especially when the storage space is used for a variety of items. This allows you to quickly know what is contained in the bin or basket without having to pull it out.
But, don’t stop there! Here are other places to label:
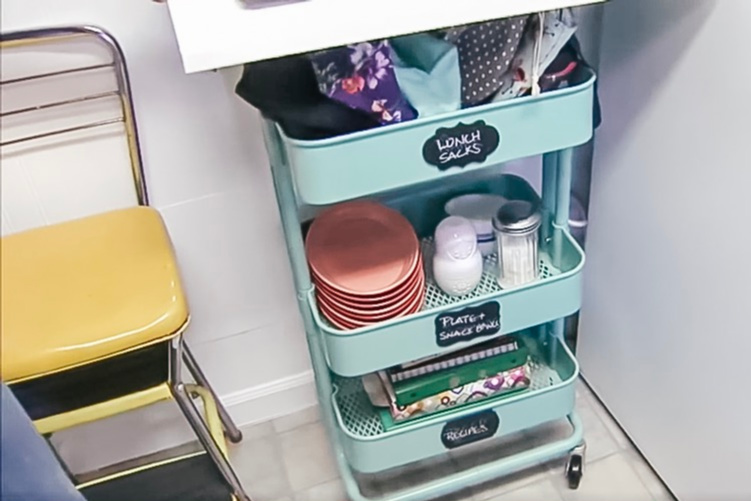
Label the Shelf
Hey, anything to make it easy to put things away is a win, right?! This is especially useful for project bins/baskets that will be pulled out of the space and then returned later, like this snack bin below.

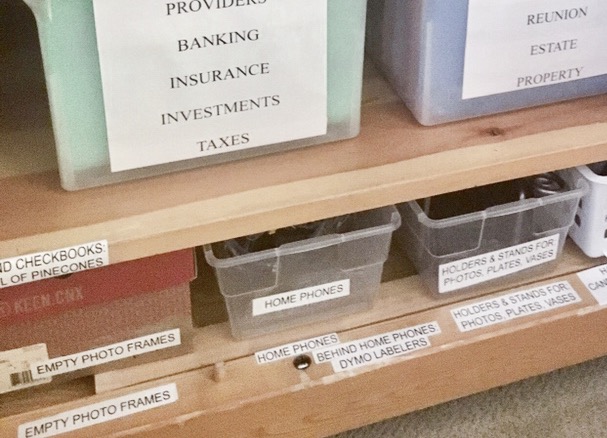
Label Hidden Spaces
As you can see in this client project, we had to figure out how to label these deep, multi-purpose shelves so the homeowner could make use of all of her space.
We ended up storing less-frequently-used items behind other items. Then, we labeled the shelves with the obscured contents in the back as well as the forward items. Labeling items in hidden spaces is just smart organizing!

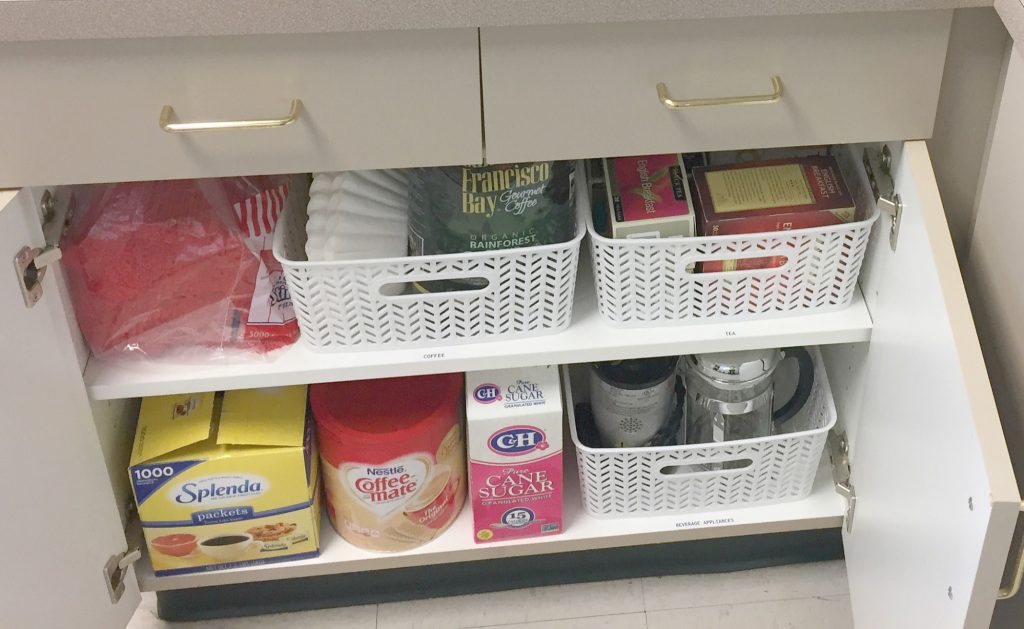
Label Common Use Areas
Storage spaces aren’t the only common use areas that benefit from labeling. Any places where multiple people are taking out and putting away items should be labeled.
Here’s a cabinet in a break room that we organized. Labeling the shelf ensures that everyone knows where the coffee basket belongs!
When you get on a labeling roll – and you will! – have fun with it! Get creative and you’ll find many areas around your home that will benefit from labeling. Some examples:
- Shelves in your fridge
- Cords in a power strip or cables behind a TV
- Toothbrushes and other personal care items
- Breaker box in your garage
- Keys!
- Hand-held radios
- Potluck serving trays and serving utensils
- Flash Drives
We hope these ideas have sparked your imagination for how labeling can help preserve the organizing systems around your home and make finding and putting things away a breeze!
Share in the comments your favorite places to label or what you’re going to label first!
Happy labeling!
Related:

- Don’t miss a thing! Get our blog straight to your inbox by subscribing today
- For hands on help with getting organized, hire an order restorer
- Ready to reclaim your life? Take our online Life Reclaimist Series and take back your Household, Work, Health, and Spirit
- Subscribe to our YouTube channel for more organizing videos